About
Time: Sep 2022~ Dec 2022
Skills Gained: 3D printing, Pybullet, Servo Control
Target
Designed, CAD, Manufactured, Assembled, and programmed a robot that can walk fast
Time: Sep 2022~ Dec 2022
Skills Gained: 3D printing, Pybullet, Servo Control
Designed, CAD, Manufactured, Assembled, and programmed a robot that can walk fast
Other designs
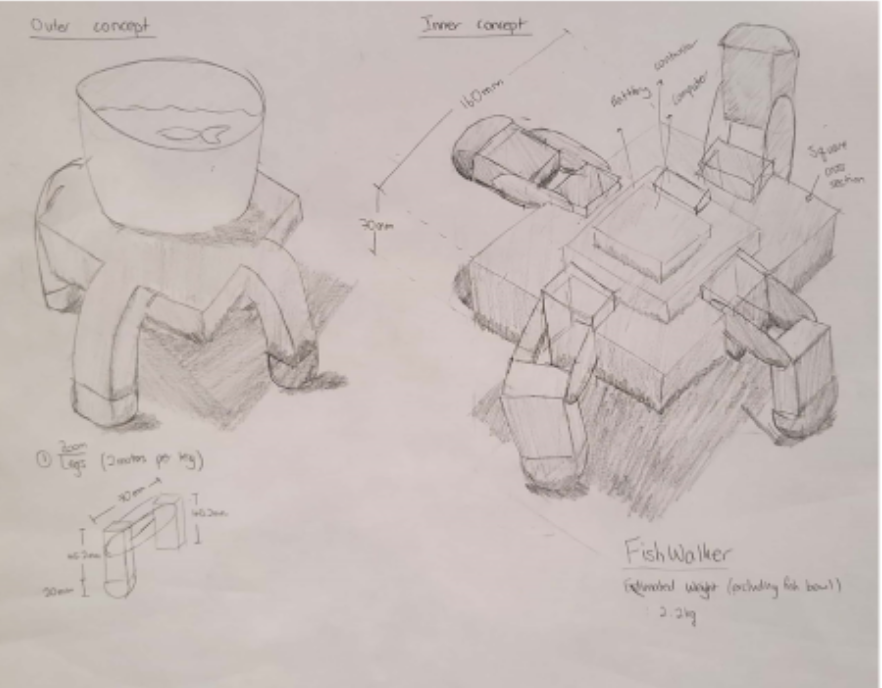
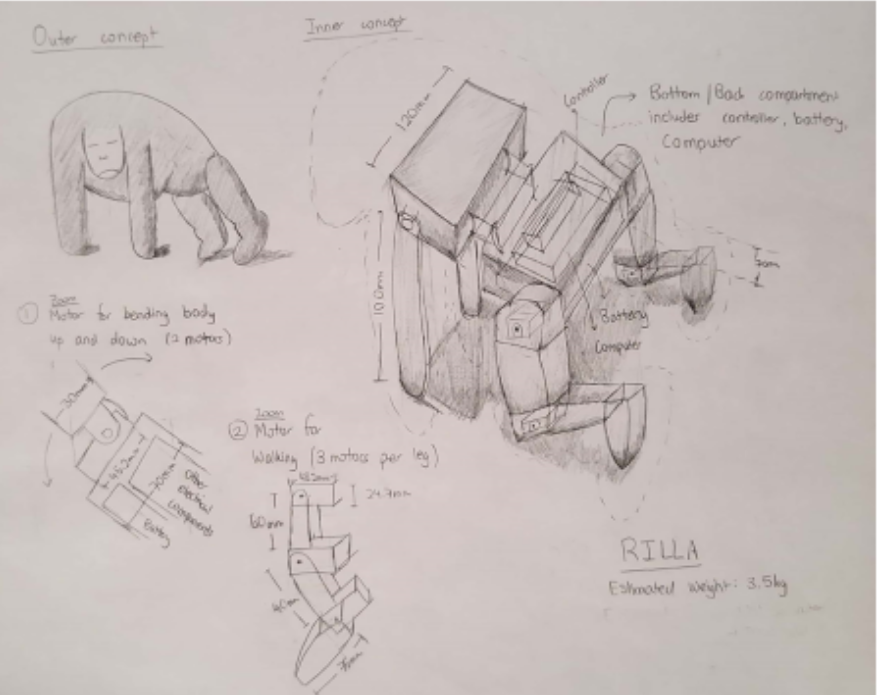
Prelimilary design mainly focuses on the real contour of our robots. We want to make sure the robot is able to be made and also desgin the space where we put the electronic components. During the design, we have to think of overall walking motions as well as the stressed while walking.
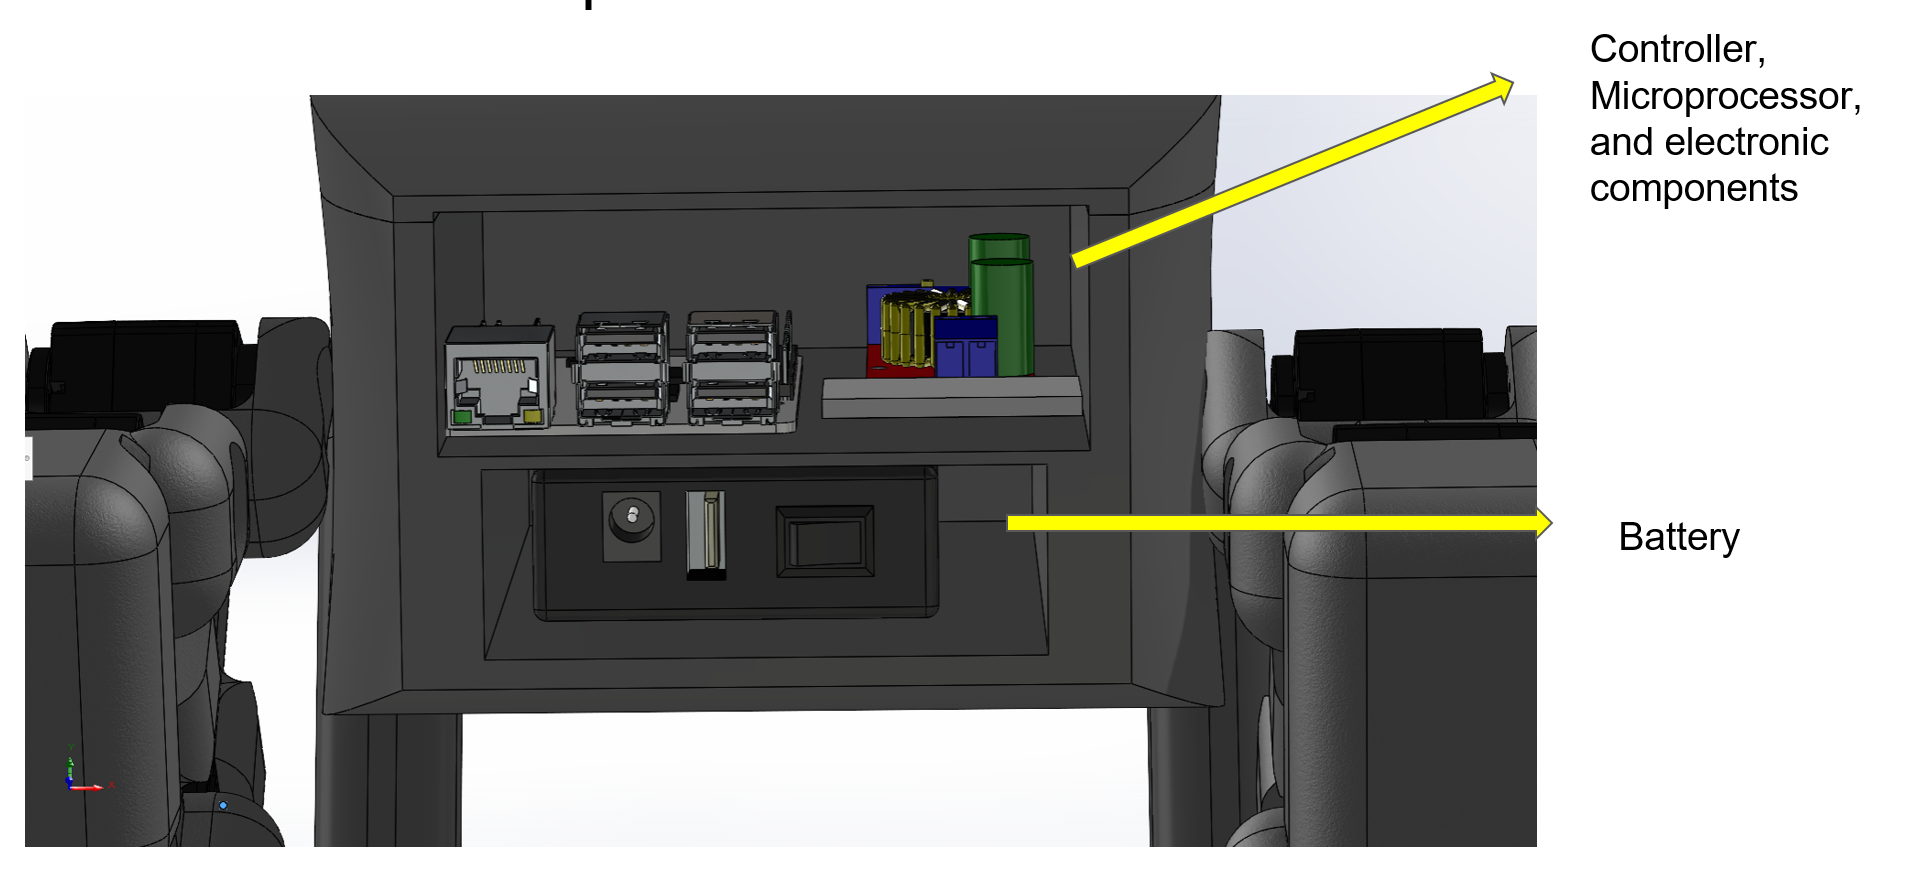
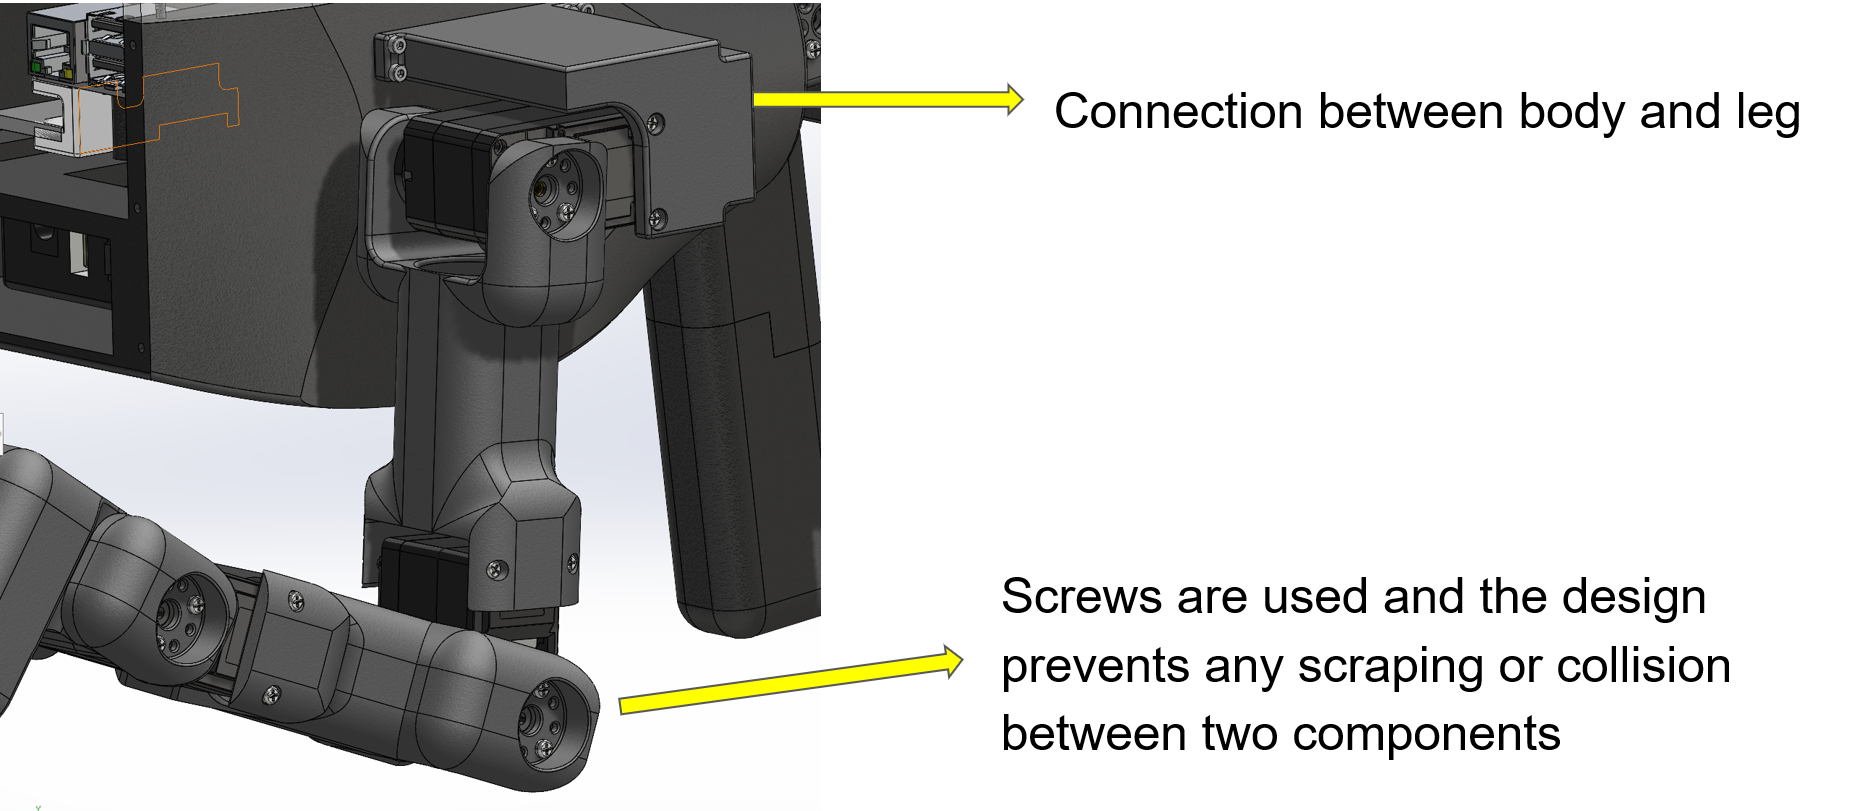
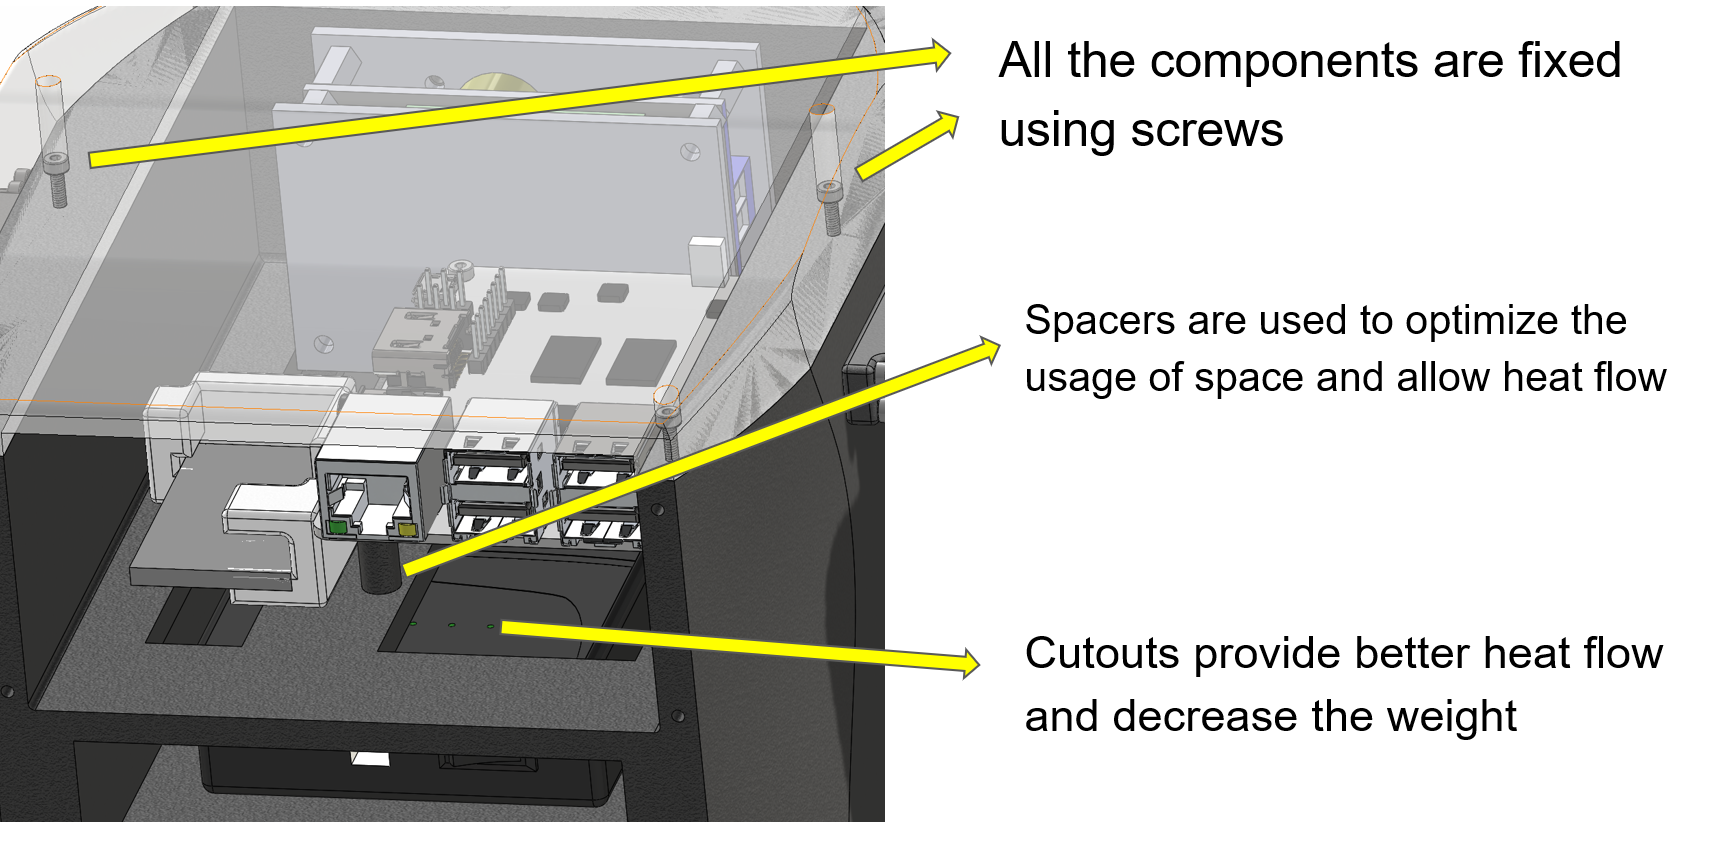
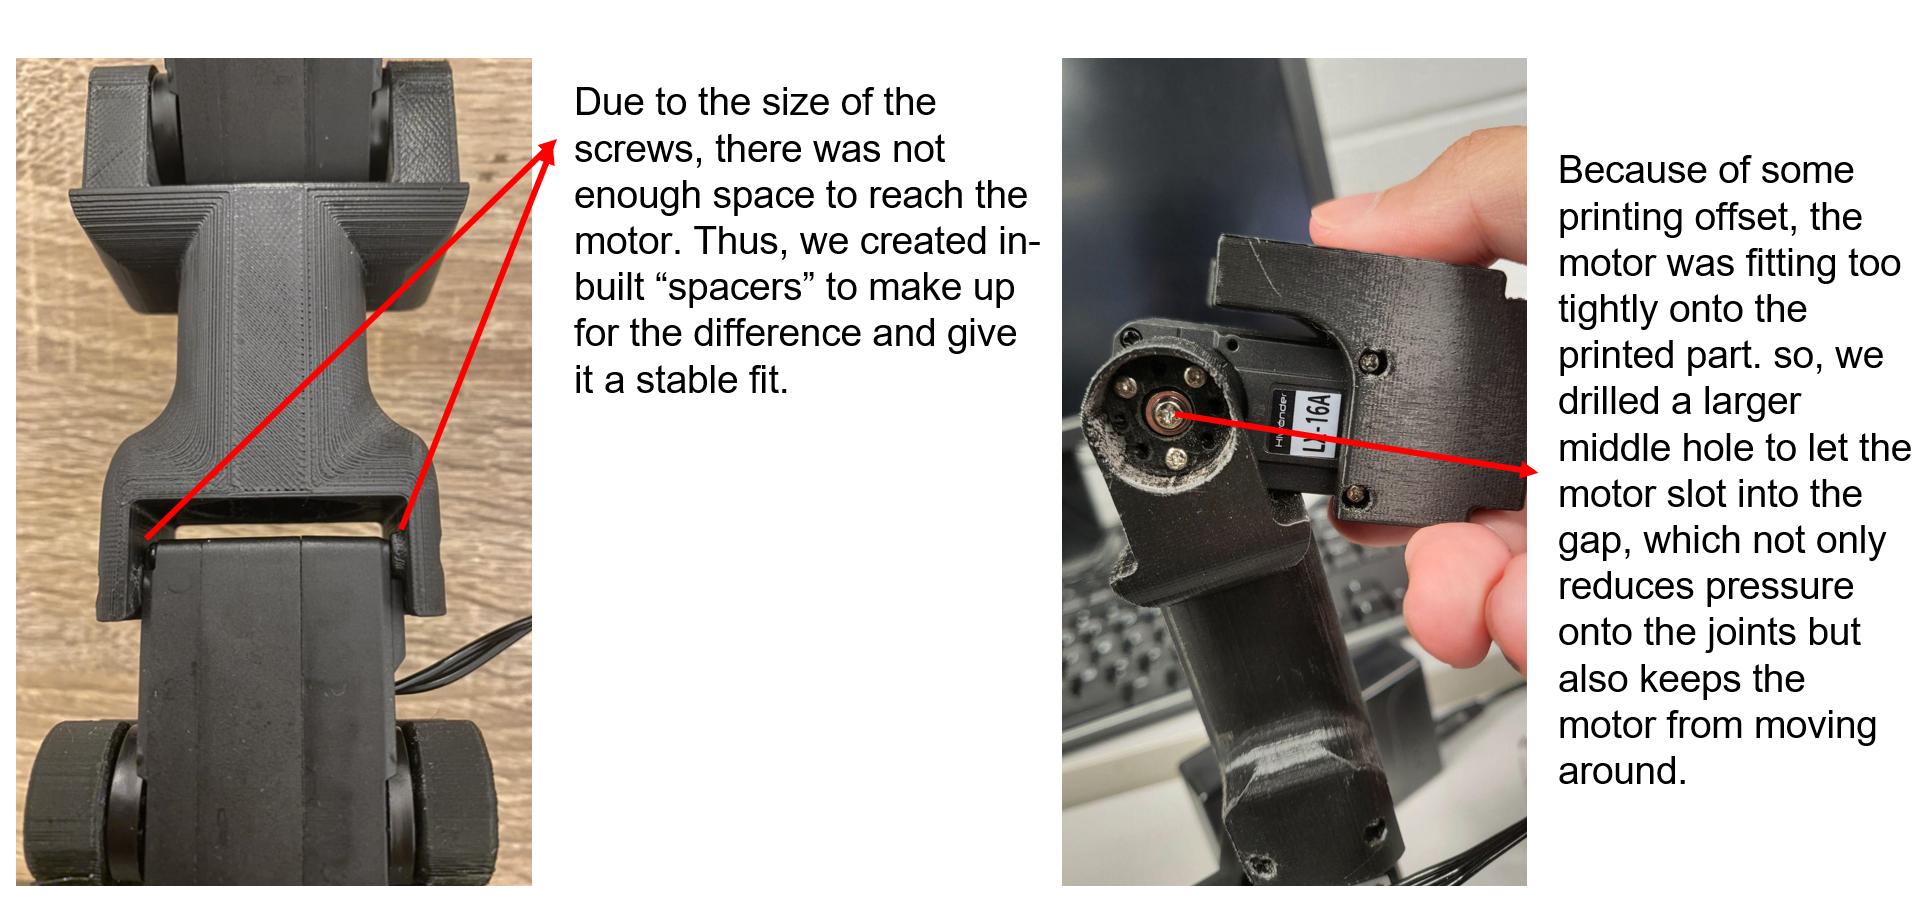
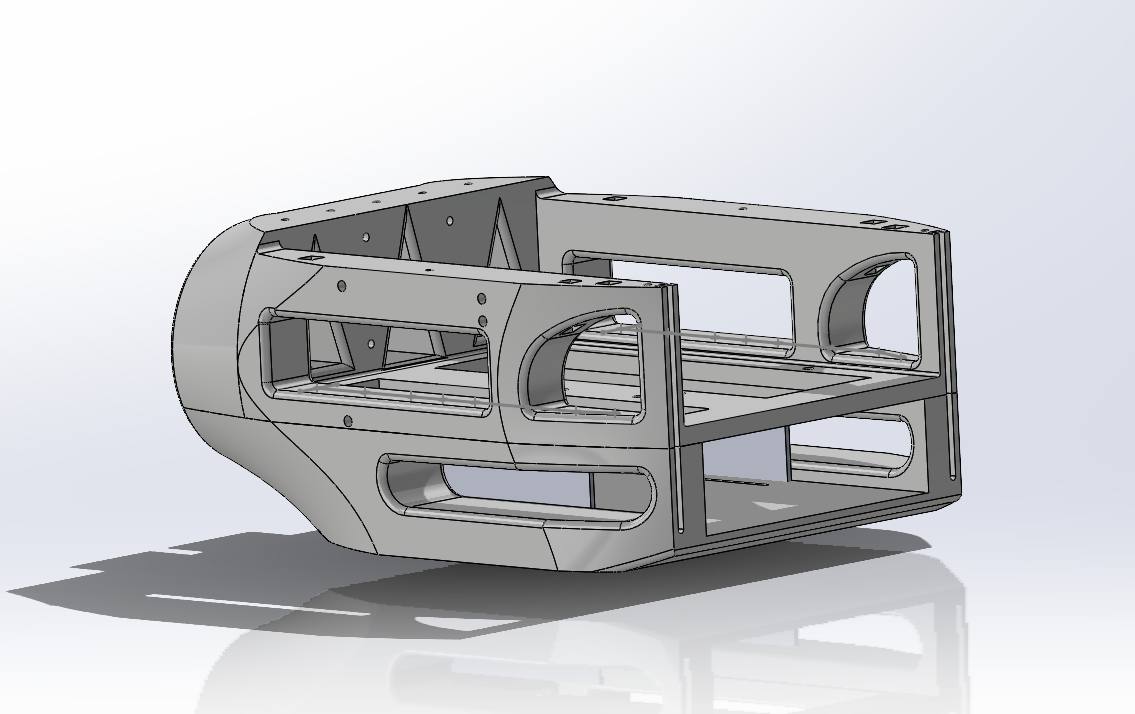
Based on previous design, we need to handle all the details such as screws, cuts, wire managements, and space management. We made severals cuts to both reduced the weight and also increase the heat flow. The cuts can also provide spaces for wire managements. The spacers are used for electronic componets, given the body more usable spaces and heat dissipation. Moreover, at this stage, we made all corner fillet to prevent from potential cracks.
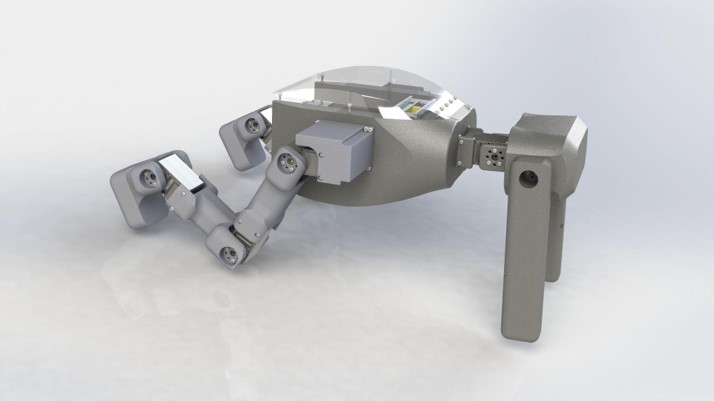
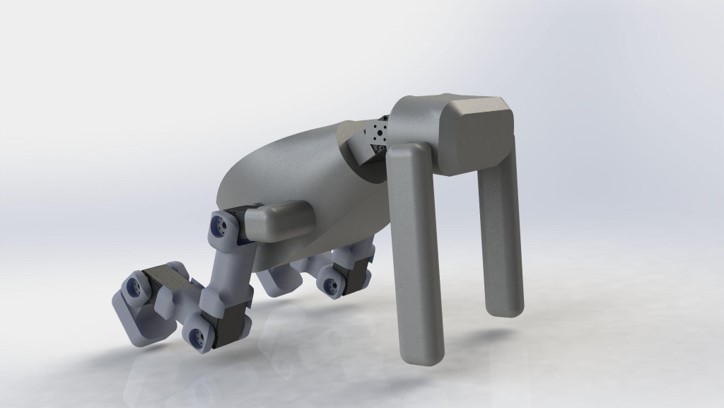
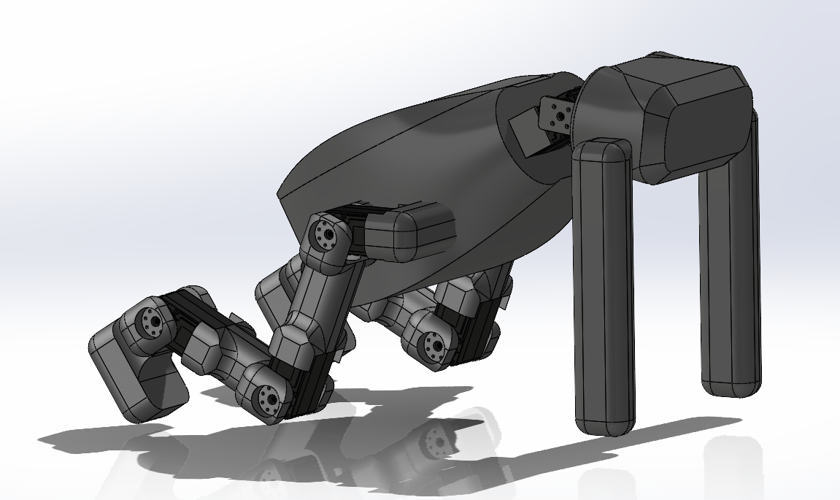
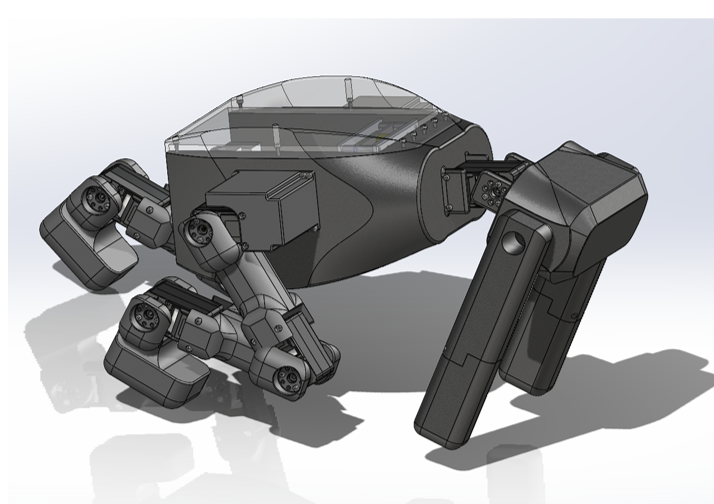
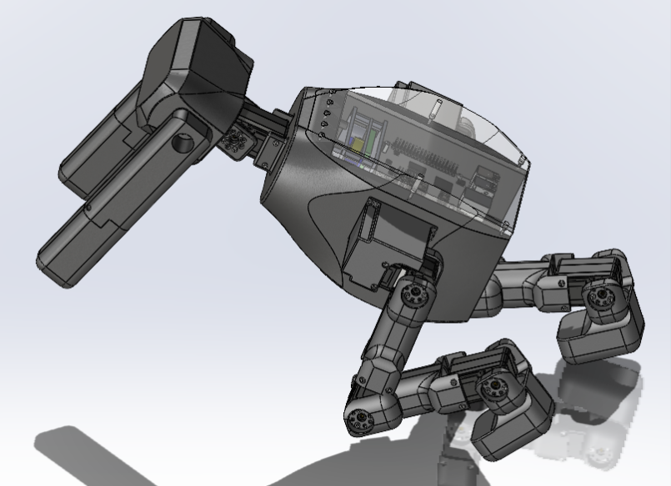
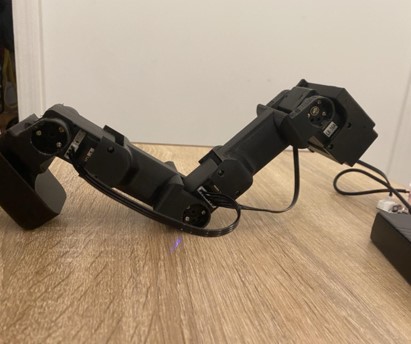
Multiple poses shown
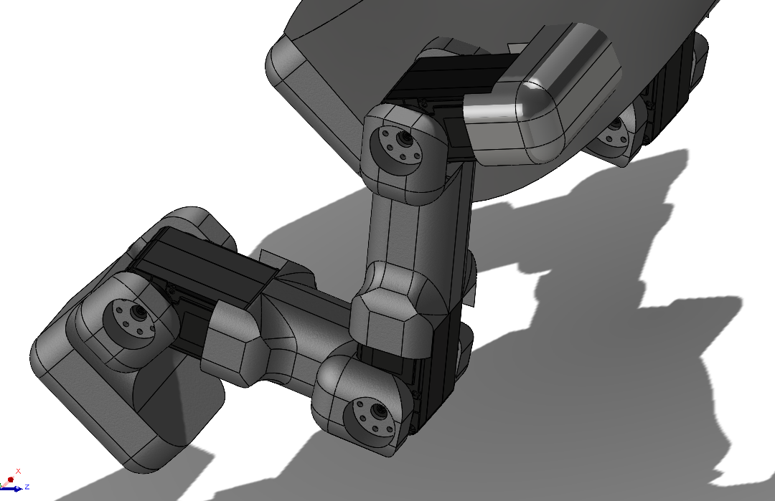
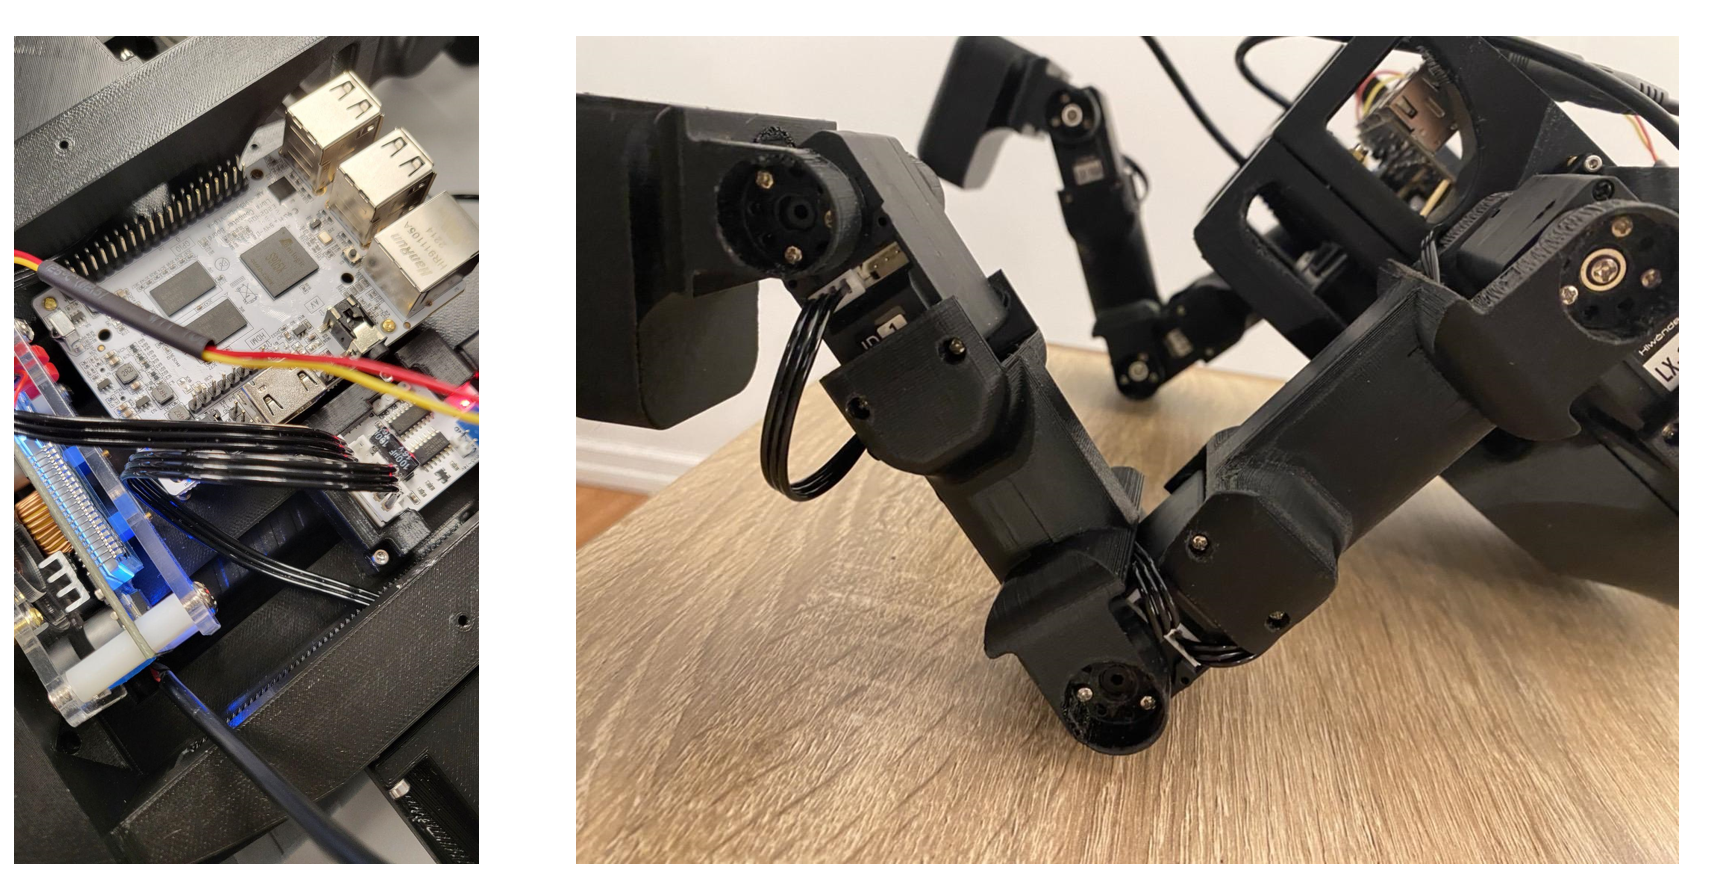
Detailed close up
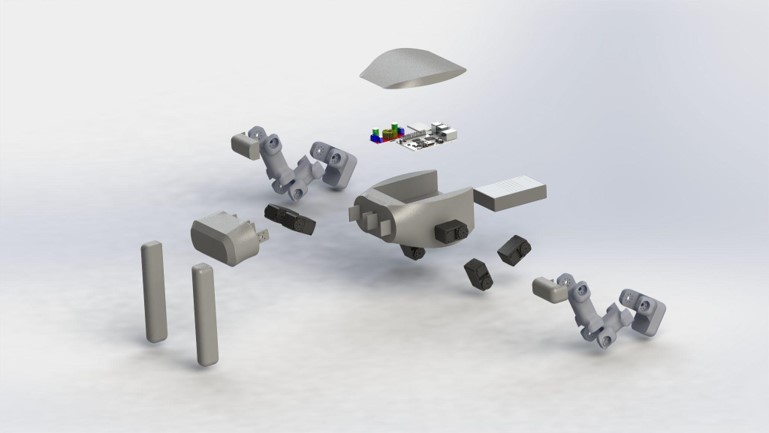
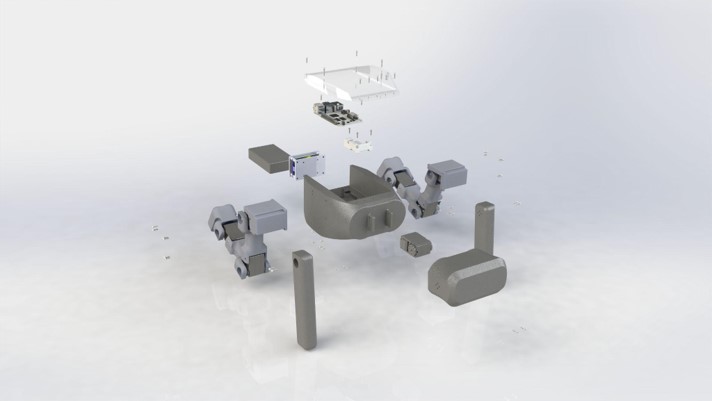
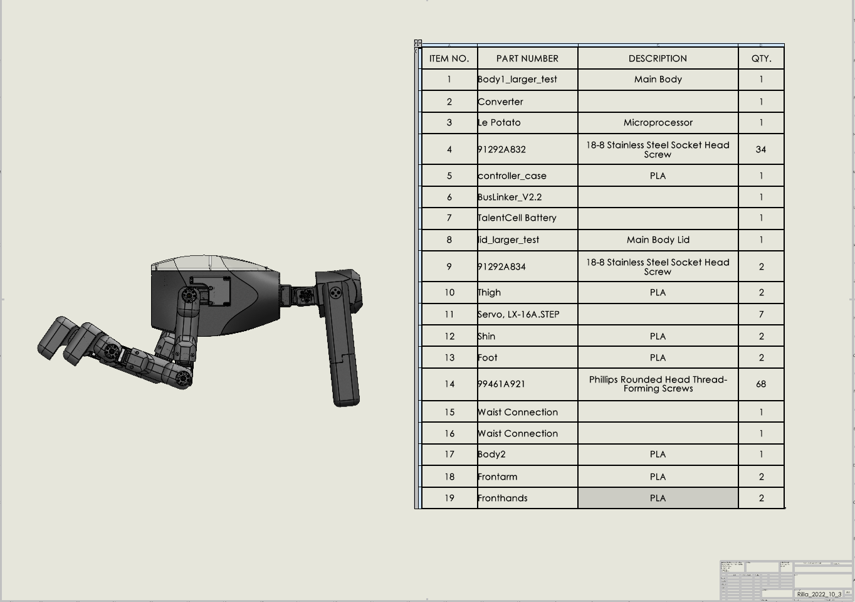
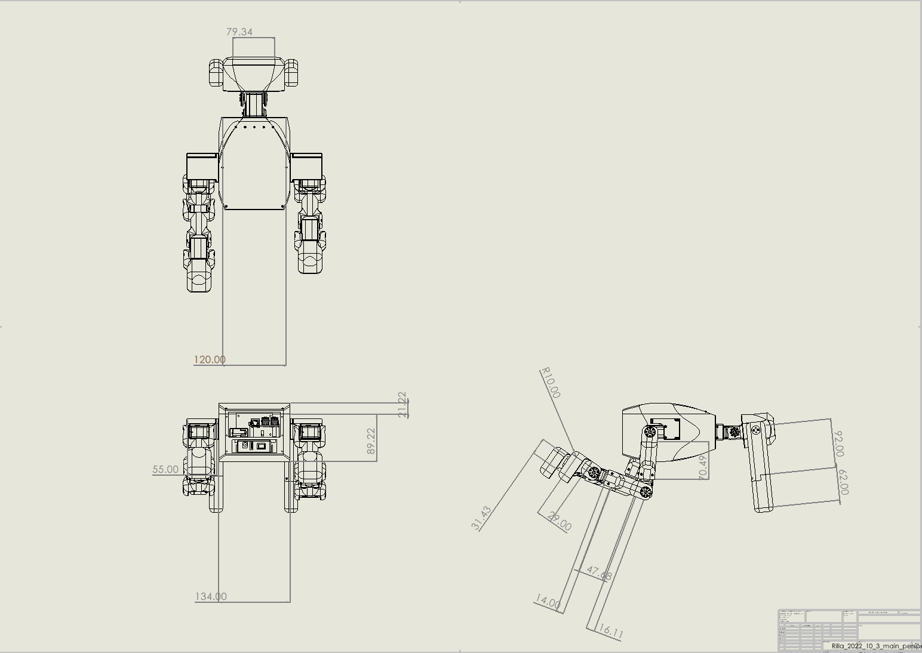
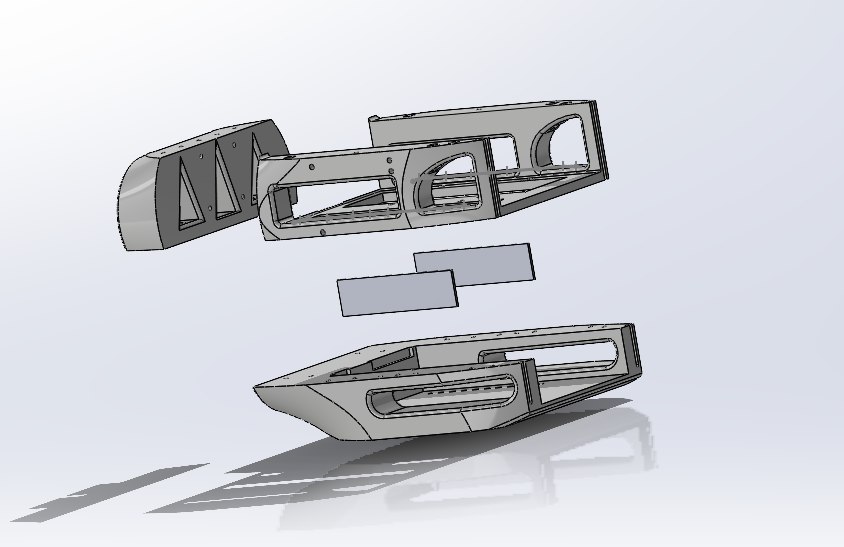
Exploded View
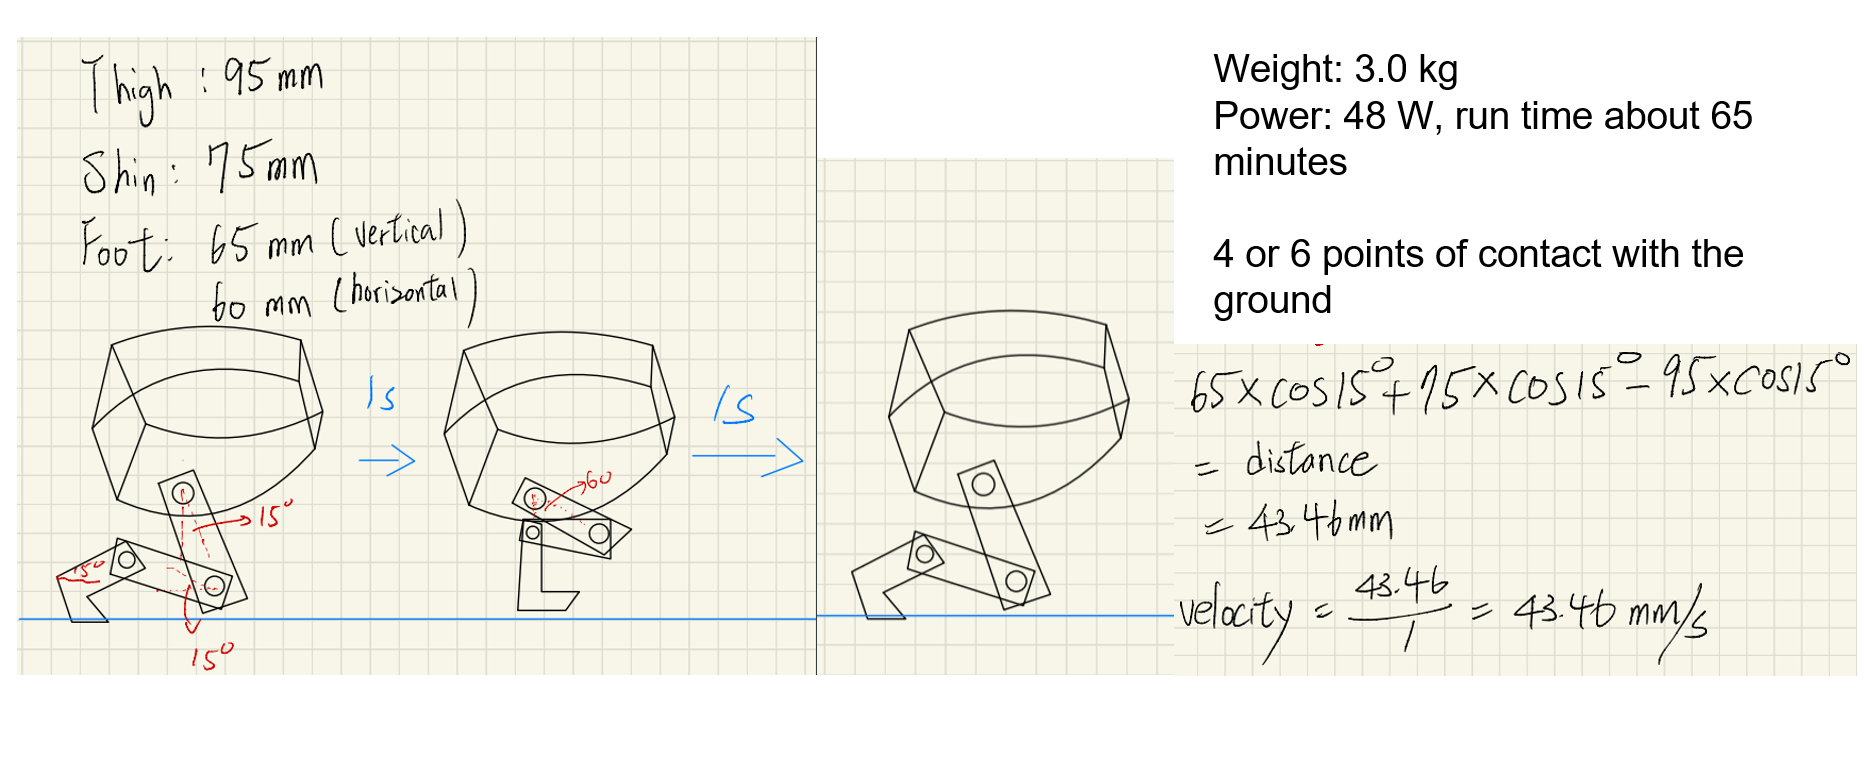
BOM & Dimension View
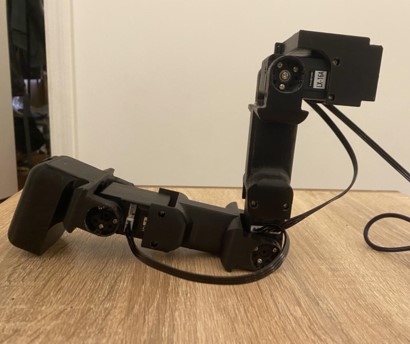
At this stage, we first printed the parts of leg to make sure the leg is both printable and is able to be assembled. Also, we did walking leg test in both slow motions and extreme positions to ensure that the legs can work as we expect.
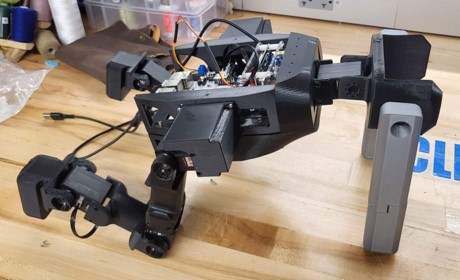
The main movement comes from pushing itself with the friction of the foot

At this stage, we printed and assembled all the parts of Rilla, and we programmed simple actions for it. However, we encounter lots of problem at this stage. The first issue it that our main body spent too much time on printing, which we are only allowed to print 12 hours. Hence, we seperate the main body into more part and made some cuts to reduced the time of prinitng. Another issue is that the the holes for insertions are a bit small, causing us pretty hard to do great insertions.
We seperated the body into three parts to reduce the priting time. The battery walls are also seperated to save the time. To even reduce more time, we made the cuts from renctangle to triangle, since triangle cuts do not need supports.
The leg motion is tested in a slower movement
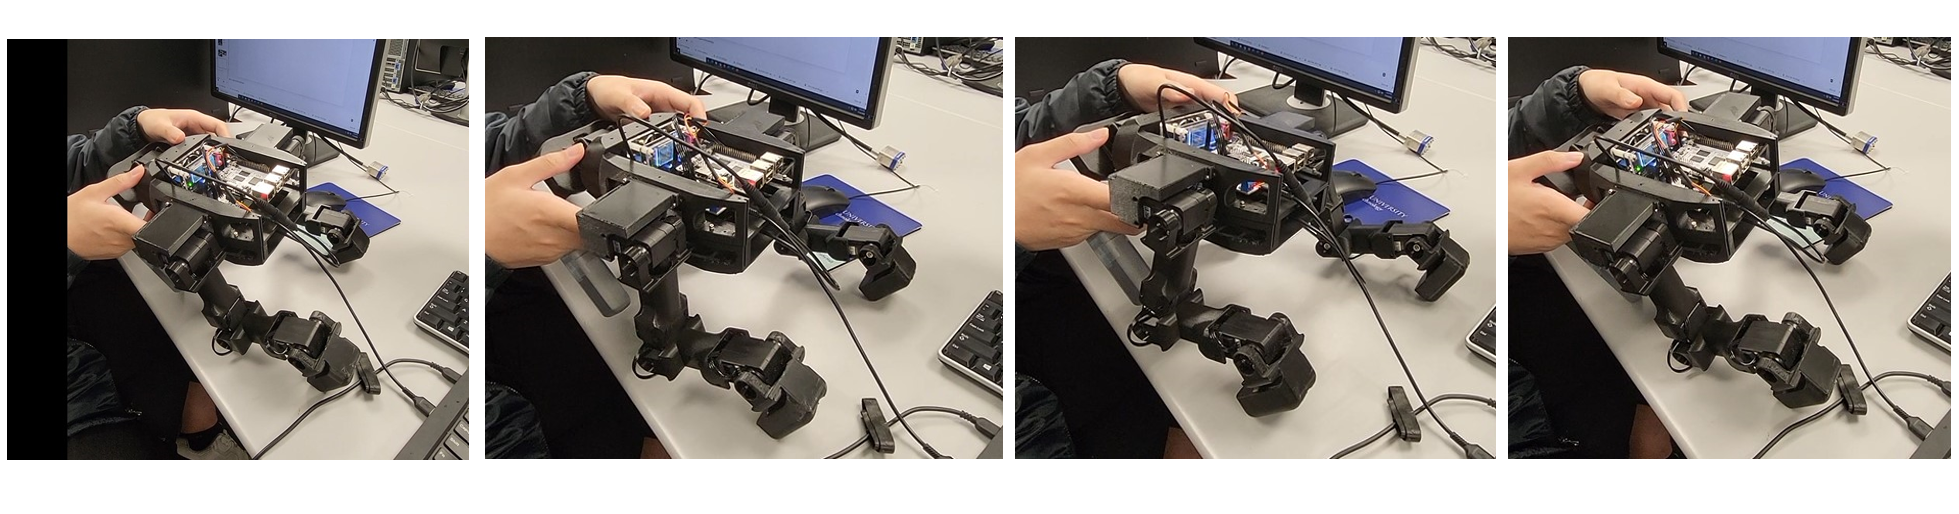
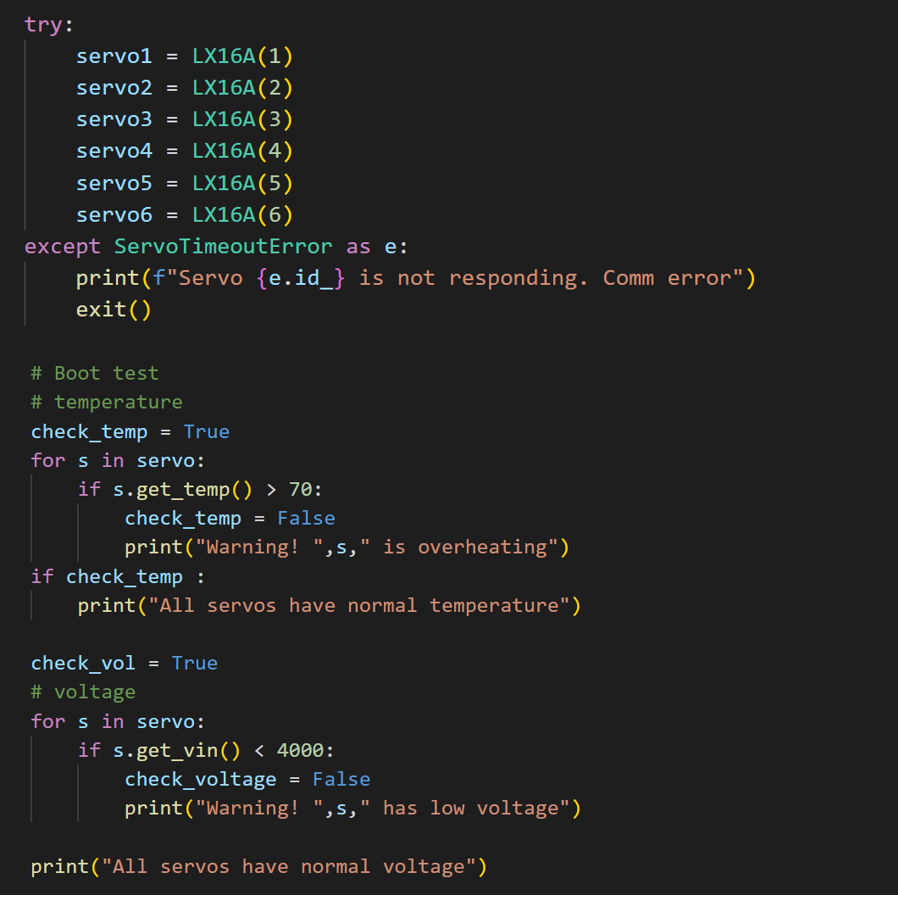
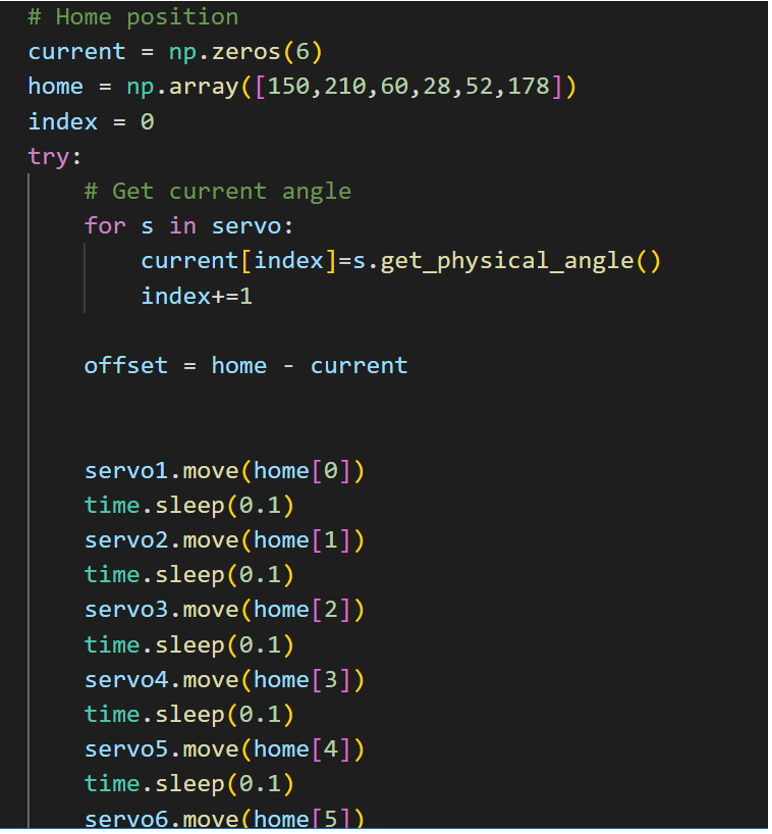
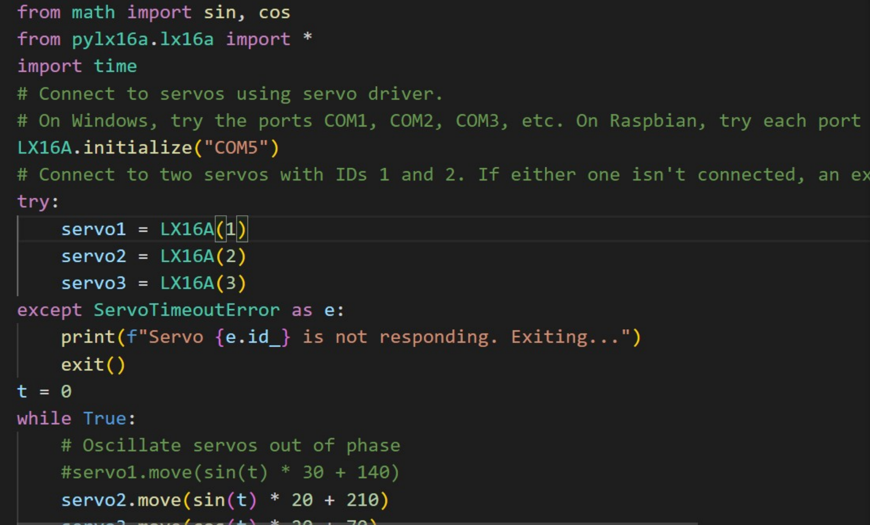
THe boot test routine is used to check if servos have any problems. The home position makes sure robot always starts with same position.